...
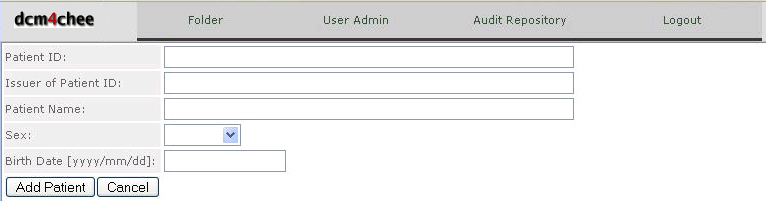
All fields are case sensitive - except the Patient Name Field.

Function Buttons
The buttons for functions in dcm4chee-web can be divided into two categories: the buttons placed in the header section of the window, and the buttons placed next to the entities in the folder.
...
- Patient ID
- The ID of the patient. This is typically a person number, medical record number (MRN), social security number, or another unique patient identifier generated or handled by a Hospital Information System, Patient Administration System, or a Radiology Information System.
- Issuer of Patient ID
- Identifier of the assigning authority (system, organization, agency or department) that issued the Patient ID.
- Patient Name
- The name of the patient.
- Sex
- Choose the gender (sex) of the patient. Female, Male, and Other (unknown) are all valid options.
- Birth Date
- The birth date of the patient in the format yyyy/mm/dd!new_pat.png!
 Merge Selected Patients
To merge two (or more) patients in dcm4chee-web, the patients must be marked (selected) by clicking the checkbox next to the patients. The boxes will now contain a checkmark. It is not possible to merge patients by a checkmark at the study or series level.
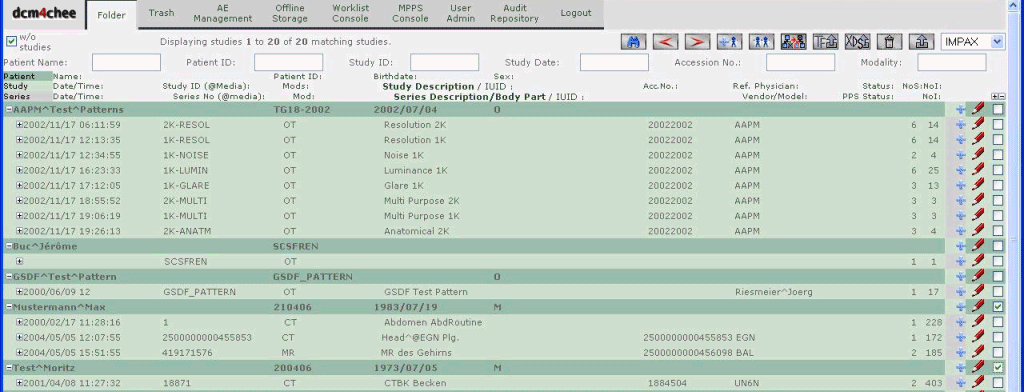
After the patients have been marked in the folder list, click on the button "Merge Selected Patients". This shows the list of patients that will be merged. In the column Patient ID click the checkbox to mark which patient should be the remaining patient. Click Merge to merge the patients or Cancel to cancel the operation.

 Move Selected Items
To move one or several items, the source and the destination must be selected. To select a source or a destination just mark it in the checkbox next to the entity.
There are some selection rules for source and destination:
...
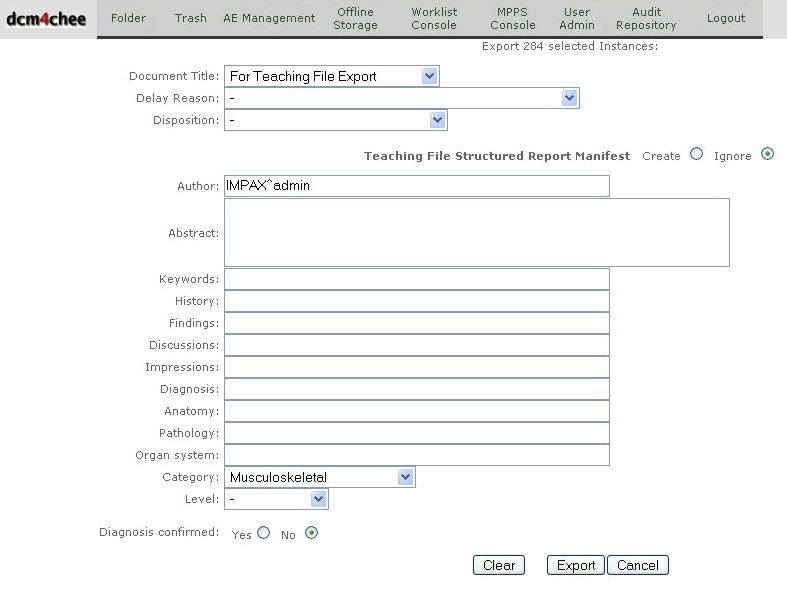
 Export Teaching Files
To export an entity or several entities (patient, study, series, or instance/image), click the checkbox next to the line or lines to mark the entity/entities. Click the button "Export selected instances to Teaching File Sytem" to export the entity or entities marked. In the next window you can select different export options and define optional included additional Teaching File Information.
 Provide and Register Imaging Document Set to an XDS-I Registry/Repository
To register an image document set click the checkbox next to the line or lines to mark the entity/entities.
In the next window you can edit your XDS-I metadata, which will be exported with the selected entities as Key Objects.
...
 Move Selected Entities into the Trash
To delete an entity or entities (patient, study, series, or instance/image) click the checkbox next to the line or lines to mark the entity/entities.
Click the button "Delete Selected Entities" to delete the entity or entities marked. Confirm or cancel the operation by clicking the appropriate button in the ensuing confirmation pop-up window.
 Permanently Delete Selected Entities
If you want to permanently delete the entities, you have to select the Trash folder and select the entities you wish to delete. then press the "Delete selected Entities" button to permanently delete the entities.

 Undelete Selected Entities
To undelete entities in the Trash folder you have to press the "Undelete" button.
 Send Selected Entities to Specified Destination
To send an entity or entities (patient, study, series, or instance/image) to a DICOM destination click the checkbox next to the line or lines to mark the entity/entities.
...
All fields can contain alphanumeric characters, except the Date/Time field, where the format yyyy/mm/dd should be used.
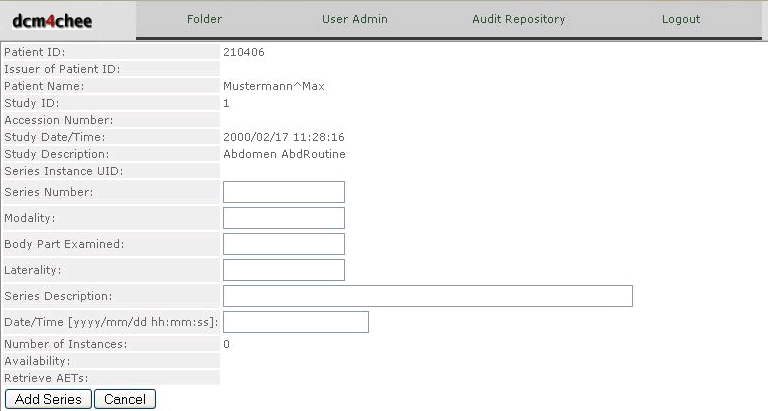
Click the "Add Series" button to add the new series or "Cancel" to quit without adding a new series.